Monday, March 25, 2013

Hubby's Requested Coconut Pineapple Birthday Cake

MOIST AND PERFECT FOR SPRING COCONUT PINEAPPLE CAKE
Before I forget, here is the recipe for the Birthday Cake I posted last night.  For this post I photoed my slice of this very delicious cake, a cake that will become a regular in our family dessert rotation...I was actually very surprised by Hubby's choice of cake...I don't remember him ever requesting a flavor other than dark, fudgy chocolate.

Ingredients:
1 1/2 cups unsalted butter, room temperature
2 1/3 cups sugar, divided
6 large eggs, separated
3 3/4 cups cake flour
1 1/2 teaspoons baking powder
1/2 teaspoon salt
1 1/2 cups milk
1 teaspoon vanilla extract
1 teaspoon coconut extract

Method:
Preheat oven to 350^.  Butter and flour (and add parchment paper, also greased, if your pans stick) 3 nine-inch cake pans.  (For Hubby's party I made 2 larger layers for the ease of our large family gathering with several young children who appreciate smaller slices.  3 layers are prettier.)

In your mixer bowl with beater attachment, combine butter and 2 cups of the sugar.  Beat until fluffy. Add yolks, one at a time, beating well after each addition.

In a separate bowl, sift together all dry ingredients.  Add this dry mixture to the butter mixture alternately with milk, beginning and ending with the flour mixture.  Beat slowly as each ingredient portion is added and mix only until combined.

Beat in vanilla and coconut extracts. Mix on medium for about 30 seconds or just until all ingredients are well combined.

Remove this batter to a different large bowl and clean your mixer bowl.  Whip egg whites until they hold soft peaks, then, while mixing on slow, add last 1/3 cup sugar and whip to stiff peaks.  

Gently fold egg white mixture into batter in thirds.  Spoon batter into prepared pans.

Bake for 25 minutes or until a cake tester inserted into the center comes out clean. (My larger pans took an extra 5 minutes.) When done, remove pans from oven onto wire racks.  Cool for 10 minutes.  Remove cake from pans (and remove parchment paper if used)  and let sit until completely cool.

While cake bakes and cools, make filling and frosting.

Pineapple Curd Filling Ingredients:
3/4 cup sugar
1/4 cup cornstarch
1 20-oz can crushed pineapple, drained--keep both juice and pineapple
2 Tablespoons freshly squeezed lemon juice
3 egg yolks, lightly whisked
1/4 cup unsalted butter  (1/2 stick of butter)
1/2 teaspoon pineapple extract
pinch salt

Method:
Using a heavy saucepan, combine sugar and cornstarch and salt.

Add the drained pineapple juice and the lemon juice.  Whisk together.

Add the yolks and cook on medium heat until mixture boils..boil for 30 seconds more until mixture becomes thick like a pudding.  Remove from heat.

Stir in butter until completely melted.  Now stir in the crushed pineapple and pineapple extract.  Let this filling cool.  If necessary refrigerate for an hour.  (This filling should be thick enough to not spread or run when spooned onto a cake layer, but soft enough to spread easily when pushed over the layer with a spoon.)


White Frosting  Ingredients and method:
8 ounces white chocolate  (Place in medium size microwavable bowl.)
1/4 cup heavy cream (Add cream to white chocolate and microwave 30 seconds, until mixture is just warm.  Stir these 2 ingredients together until smooth and creamy.  Microwave again in short bursts if necessary.)
1/2 cup butter, room temperature  (Add to white chocolate-cream mixture and stir until smooth.  If too thick or white chocolate not completely melted, microwave for 10 second bursts and stir until smooth.)

Place above into mixer bowl with beater attachment and add:
1/2 cup sour cream
1 Tablespoon coconut extract

Beat until smooth and creamy.  Mixture should now be cool.

Next, add about 6 cups confectioner's sugar.  Easiest to add 2 cups at a time and beat slowly after each addition.  When all sugar has been added, beat on medium high until smooth and fluffy.  Add enough sugar to make frosting a consistency that is  easily spreadable or that can be piped and will keep its shape.

Assembly:

Place one cake layer on cake platter and top with 1/2 of the pineapple curd filling.  Spread to within 1 inch of cake edge.  

Add second cake layer on top and then add 1/2 of the curd on top of this layer, again spreading to within 1 inch of cake edge.  (When a layer is added on top of the filling it will push the filling further to the cake edge, but not over the edge and into the area where you will want to frost.  Curd and frosting will not mix well.

Now add the top cake layer and you are ready to frost sides and top of cake.  There should be enough curd and frosting to completely cover wanted areas well.

Add sweetened, shredded coconut to sides and top of cake immediately after frosting.  As cake sits, the exterior will set up a little so that the coconut will not stick.

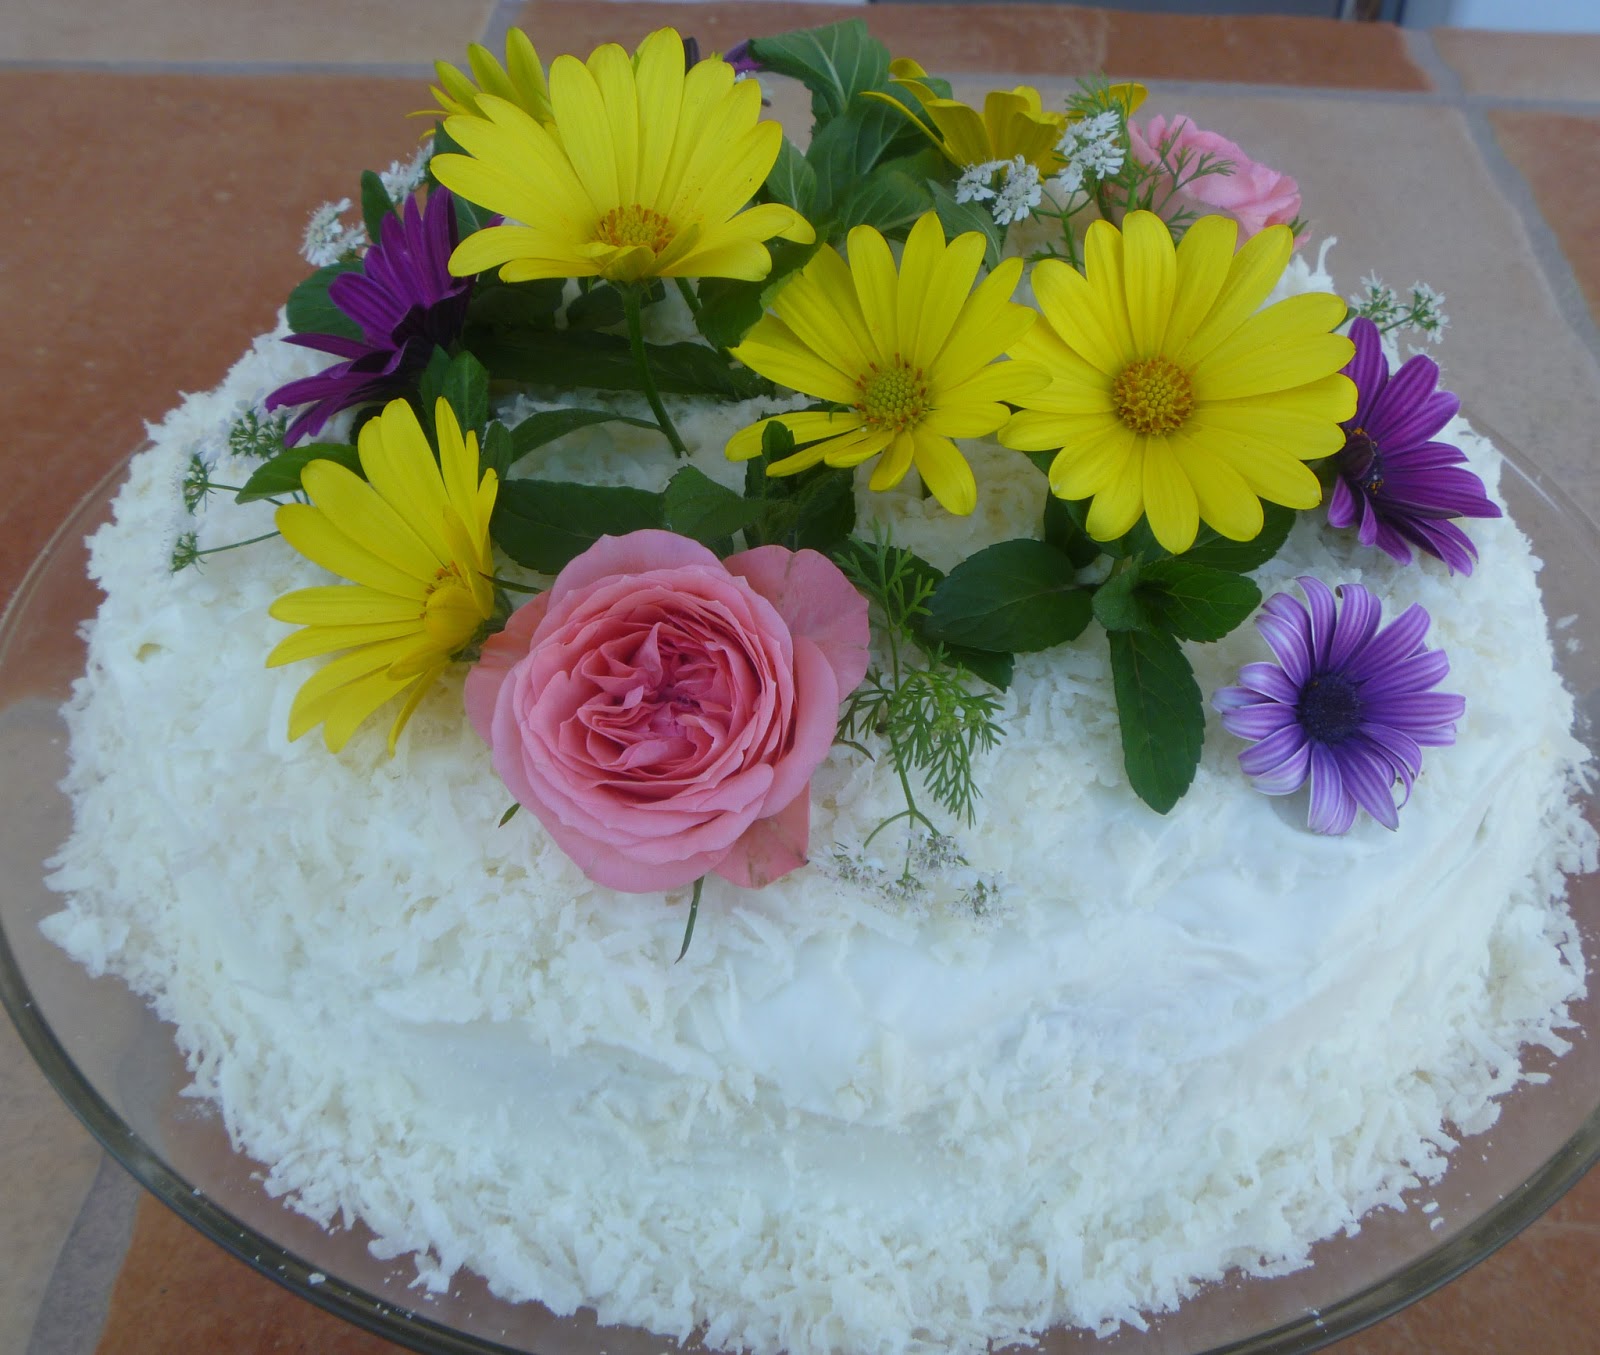
Note:  Any white or yellow or sponge/angelfood cake will work.  What really makes this cake wonderful is the delicious filling which keeps the cake moist.  Also this simple, beautiful frosting is a lovely white contrast to the very yellow filling, making a lovely Spring presentation.  I chose to decorate my cake top  with Spring flowers from our yard.  (See previous post.)  This cake keeps well at room temp for 2 days.

This cake would be great at a Hawaiian party or for other Tropical menu dinners.  If you love coconut and pineapple, you will love this cake!


Sunday, March 24, 2013

Baked Sunday Mornings: Chocolate Peanut Butter Fondue

I'll be short and sweet...

This post was due at least 12 hours ago, but I saved making the Chocolate Peanut Butter Fondue for Hubby's and Son #2 outdoor birthday party this evening.  Son's birthday is tomorrow and Hubby's is Tuesday.  The whole family  came for dinner today to celebrate, including Stephy-Wephy who is due to deliver me a new granddaughter TODAY!  But no luck.  Maybe tonight?  I'm having more anxiety than Stephy.  Good Grief!  Much better than when I waited unpatiently for Santa as a kid.
CHOCOLATE PEANUT BUTTER FONDU
Hubby is a dark chocolate man.  Son # 2 is a peanut butter guy.  So this treat represents both these terrific men in my life.

This fondu is like eating melted, creamy, warm peanut butter cups.  And, of course, we added Baked brownies to our platter as a preferred dipping accompaniment.

HUBBY'S HAPPY BIRTHDAY CAKE WITH GARDEN FLOWERS
This was a fun recipe and was a big hit with all the "dips" at our party.  For sure, I'll make this fondu recipe again!

FYI:  Hubby chose a coconut pineapple birthday cake...it is delicious!  I'll post the recipe soon because I know that coconut pineapple lovers might like to bake this cake.

Friday, March 22, 2013

Tuesdays With Dorie and Julia: Mocha Chocolate Chips

YUM!!!
 Instead of Tuesdays with Julia and Dorie, I’m late and will call this Friday night with Julia and Dorie using Rick Katz’ Mocha Chocolate Chip cookies.

This is a crazy time of year for me plus we have lots of family events over the next 2 weeks and a new granddaughter due now...I run every time my phone rings,  Usually I’m not a good phone answerer but now I hear every ring or text "ding" hoping for some good news.  So, I’m late with this post, but doing my best.

Because I’m a cookie monster, I did not want to skip this recipe, however I did have some issues with sentences like “leave at least 2 inches of space between each mound of dough so that the cookies have room to spread.”  And I had the advantage of looking through several of your posts, and I was not impressed with many that I saw.  Sorry.  Of course, I did see many that looked great, but a simple recipe for all us experienced bakers should have turned out very well for most everyone.

I do love apricots and wanted that addition.  I am not a coffee person, so I left out that flavor.  I do not care for cookies that spread so much during baking especially after the dough has chilled for many hours.  And I do not like to chill a simple cookie dough unless that step has a good purpose such as rolling out a firm buttery dough.  In very hot Arizona my best cookies do not have hanging out time, even in the fridge.  My kitchen is often 86-88^ with the oven on during our hot summers which last for several months.  Butter melts and chocolate melts quickly.  Doughs need adjusting.  With all the spreading these cookies do, they would be impossible in AZ.

Many of you posted that you liked the white chocolate with the apricots and that made good sense.  And I had another item to try.  Instead of a great dark chocolate, the “best chocolate you can,” I wanted to try the new Costco chocolate chips.  A friend said she had tried them and likes them and asked my opinion.  Since I’ve not used them, I have no opinion, but cringe a little at using a Costco chocolate.  But Hubby went to Costco for cases of copy machine paper for the office, and he brought me Costco chocolate chips which he knew I “needed.”  It was a surprise, like bringing me flowers.  (Because I tried a new chocolate chip and also used white chips rather than chunking up white chocolate.)
                                               
To combat what I perceive as extra spreading for this baking dough I added 1 cup of quick oats.  I like oats in many cookies and I also think they go well with apricots and chocolate chips.  To color my dough and give a flavor boost I added 2 Tablespoons of cocoa powder.  I baked the cookies for 11 minutes and I’m very happy with my changes.  These are great cookies!  And no fridge time and reasonable spreading.  And I like the Costco chips for day-to-day baking.  My warm cookies oozed with that lovely chocolate and I have been fixed with happiness for the night.

Thanks to your many posts which I read through before baking this recipe.  You all inspired me to make this recipe my own.

Have a great week
!

Thursday, March 21, 2013

French Fridays with Dorie: Ispahan Loaf Cake


IT'S A KEEPER!
Such a wonderful cake made from almond flour, raspberries, and fragrant rose syrup.  I've been doing needed yard work all week:  planting my summer garden (which the dog unplanted twice), mowing the lawn, trimming Winter's frost kill on trees and shrubs, raking, and getting everything ready for Spring, which here in sunny AZ is like Summer in many areas.  We've had a few mid-nineties days, but mostly eighties.  I have a "farmer tan" and I feel healthy.  I mailed away all our business taxes on Monday and I'm taking a break to get things ready for a family Easter holiday, for Hubby's and Son # 2's birthdays in a few days, and for a new granddaughter due on Sunday, or any moment  (Honey will have a new baby sister...and Honey gets to stay with me for a week).  So many special days to look forward to over the next week.  After several days of "man-work," I'm tired and anticipated some relaxing baking fun with today's Ispahan Loaf Cake.

One of the very best things about this time of year is the smell.  Everywhere.  All our citrus trees are in bloom and our yard is perfumed with orange blossoms.  Ahhhhhhhhh.  I love the outdoors.  We'll be ready for an Easter egg hunt  and our usual brunch with all the trimmings and desserts we want to try.  Of course, the Easter Bunny keeps coming to our house even though our kids are grown.  Grandkids keep the fun in so many special days.

Today's loaf fits in with our season.  When I shop at the market I find that the berries are perfect.  Beautiful raspberries are inexpensive, abundant, and beg to add elegance to my baking.  I expected a much better than average dessert.  I was not disappointed!

This cake was simple to put together, although the rose syrup is an unusual ingredient.  I read on P's and Q's that the cake needs a little something with a glaze being a good fix.  My only problem with this recipe was the baking temperature/time.  The oven is pre-heated to 350^, then reduced to 300^ as the cake is put into the oven for baking.  At 60 minutes my cake insides were very gooey and the cake seemed to need a much longer time.  I had to run a few errands so I turned the heat back up to 350^.  I should have had time to be more patient, but could not wait.  My cake took an additional 15 minutes with the increased heat...probably would have been 15 more at the reduced temperature.

No worries, this cake is incredibly delicious!  I used Trader Joe's almond meal (with the skins) so my finished loaf may look a little extra brown rather than pink, but it is a great choice.  I added a little fresh orange zest to my glaze along with the juice of that orange because I love my oranges which will be gone in another month.  It was lovely with the rose.

For fun I picked a pretty rose from my garden to garnish my plate...we have so many beautiful roses right now which are at their best before the Summer heat torches them.  And for more fun I tried to make rose petals from gum drops for my loaf top...a task my talented daughters would have done much better.  But it is all for  fun.

If I were a royal queen (I am queen of my kitchen) I would order this cake often with my afternoon tea.  At our house, King Hubby will find this loaf as a surprise for his breakfast.  (It is fun to have Son #2 back at home.  He seems to sense when every baked good is pulled from the oven, appears for a taste, and loves everything.  He especially loves this extraordinary cake and he is impressed that it could be baked with almost all almond flour.)  I'm with Cher...I want to try blackberries, and......

Thanks to some of you who suggested a glaze.  It made a delicious difference.

Happy Spring!

Saturday, March 16, 2013

Baked Sunday Mornings: Lemon Shaker Pie

I CAN'T HONESTLY DECIDE IF I LIKE THIS PIE OR NOT???
OK.......we are pie people at our house.  (#2 Son is baking chicken pot pie for St. Paddy’s day.  I don’t know what that has to do with this fun day except that he wants to make it.  It will be an alternative to my more traditional Irish meal.  This year our dinner guests will have a few choices, one being his meat and vegetable pie.) I’ve collected every type of pie recipe I’ve ever come across and I can honestly say I’ve come close to trying them all.  I have a few shelves in my library that are dedicated to pie baking books.  We almost always have a pie or two in the kitchen waiting for hungry eaters. Right now, for example, I have blueberry and coconut cream pies in addition to my just baked lemon pie. It’s part of our fun.  But I’ve never heard of and therefore never before tried Lemon Shaker Pie.  Reading through the recipe created no excitement for this pie addict.  I decided to skip this week.  But then I just couldn’t skip it.  It is pie...I had to try it.

So I got online and read everything I could find (within an hour) about this type of pie.  The reviews are mixed.  Some said that Lemon Shaker Pie is the best lemon pie ever; much better than lemon meringue pie, for example.  Others said it was bitter and nasty and was thrown out. A few suggested that this pie is delicious if the insides are pureed and that otherwise one should expect stringy lemon pieces that are quite chewy. Some advised that it is bitter, only very thin slices would be enjoyed and only enjoyed by “adult” palates.  I read that this pie has a very strong flavor. 

The other issue is that it takes 48 hours to prepare the thin blanched lemon slices in sugar which takes away bitterness and some of the chewy texture.   I also read that the "test kitchen" has a quicker version, but most reviewers agreed that theirs in not "real" Shaker lemon pie. 
Most agreed that Meyer lemons are the way to go.

I grow Meyer lemons.  They are not like “regular” lemons.  They are a cross between a lemon and a Mandarin orange.  They are much sweeter and a different texture than the usual lemons.  I wanted to try this recipe in its pure form, just to try it out.

Then I read that a Shaker lemon pie baker should be careful to cut several steam slits into the top crust as adequate venting is very important for this pie.  I also read that some bakers did not add a top crust.   (The filling tends to clog up the vent holes.)

The big plus for me is that I love many Amish and Shaker pies.  These people were my initial catalyst in my pie baking hobby.   With that in mind, Hubby picked 2 lovely lemons for me which I sliced just in time to give the 48 hours necessary before my post would be due.

Then I decided to be smart.  I would make a top crust with lots of cutouts instead of vents, usually a very pretty crust.  Not a good idea.  The unbaked filling is very liquidy causing my top dough, which was not as sturdy as a plain crust, to sag down into the liquid.  My prebaked pie was one of the ugliest pies I’ve ever baked.  I wanted to start over, but...my 48 hours were gone and I was making only one of these mixed review pies.  So I’m stuck with an ugly pie.  But bless my Son #2 who came into the kitchen as I was pulling my finished very ugly pie out of the oven and he commented that it looked quite good.  He was even serious.  Thank you, son!

After cooling, I gave my lemon pie the anticipated taste test.  My pie slice came out with several stringy lemon slices wanting to tag along.  Hummm.  I should have chopped up my lemon slices a bit...not pureed them, but chopped smaller pieces would be a good idea.  My piece is chewy.  Not repulsive, but not like other fruit pies I bake.  A few bites have bitterness which is not nasty, but probably not for kids.  And my first bite was a piece of powerful pie.  I needed a drink of water to get it down.   The flavor is like a strong lemon meringue pie but the texture is chewy with stringy piece.  The lemon slices did not all stay round and lovely; most were broken and became long strings of lemon such as we are not used to eating.

Except for the top crust which I cut out differently, I followed the recipe as written.  (I also took the time for the blanching step.) Even though I love our citrus and enjoy using it in my baking, I can’t say I will bake this variety again.  It was interesting to try, but I have a great lemon meringue pie recipe that I find much more exciting and will stick with that for now.

I'm wondering how all your pies turned out???   Hope you had better luck than I.   Just for fun I also baked a batch of "Baked" brownies to go with my green mint chocolate chip ice cream...another one of our alternative choices for those who DO want something more traditional.

Happy St. Pat's Day to you all...hope you all have fun with something green!

Thursday, March 14, 2013

French Fridays with Dorie: Orange-Scented Lentil Soup

HEARTY, HEALTHY, DELICIOUS SUPPER
Friday Evening a week ago :  I admit that it was hard to get excited about lentil soup.  It was 80^ today and will be in the mid 80's all weekend.  Honey is having her 3 year old birthday and I'm excited that her family party will be here, at our house.  I have kid food and fun on the brain, and a healthy soup has a hard time squeezing into my plan.  

But...surprise...this is a hit.  Hubby usually starves on Fridays, then gets up early Saturday mornings, attends Weight Watchers where he loves his weigh-in proving that he has kept off the 50 pounds he lost 6 years ago, and after his weigh in, he eats junk all weekend.  By Monday he is on track with healthy eating, and as the week wears on his food consumption decreases so that when Friday arrives, he's practically in fasting mode.  It works for him.  I'm glad he is in great shape and healthy.  

Dorie's lentil soup was exactly what struck him as good Friday evening food.  He commented that it is delicious and that it is Weight Watchers approved.  I suppose I should feel honored.

I confess that I also enjoyed a bowl of Dorie's soup, feeling like it was a healthy way to begin what I'm sure will become a sugary junk food weekend.  I enjoyed the hint of orange from the peel of my Mandarin orange, and I also thought the addition of a little ginger and clove was a lovely touch.  I am really not in the mood for a pureed soup...so I didn't.   I did as Dorie suggested and added a dollop of tangy yogurt as a garnish along with thin strips of Parmesan cheese and freshly picked parsley.   I served this soup with a sweetbread which complimented the unusual spice flavors and also the sweet orange peel.

Hope you  all enjoy your green weekend with a lively dose of St. Paddy's Day which, to our family, truly celebrates the beginning of Spring.  So, Happy Spring!

Saturday, March 9, 2013

Baked Sunday Mornings: Malted Milk Sandwich Cookies


TASTY MALTED MILK AND ORANGE SANDWICH COOKIES
Hubby, Son #2, and I have a class to attend later tonight and the teacher, my friend, has a birthday early next week.  I want to take a little treat to share with the class and to bring my Happy Birthday Wishes.

I wanted something that felt like springtime, something with a little color and great flavor.

With 1 change that made a huge difference, I used today’s recipe as written.  Also, instead of the 2" cutter  and I used a smaller 1" round cutter.  The cookies grew a little during the baking process to about 1 ½” diameter.    1 or 2 bite size will be easier for the class.

My minor change that made a huge difference was to add the zest of 2 freshly picked Valencia oranges for the cookie dough and I also used their freshly squeezed juice and more zest for the filling (along with the other written flavorings).  Fresh orange was the pronounced flavor for this cookie and it was wonderful.  (Smaller size baked for 7 minutes.)  (I made 80 of these smaller sandwich cookies.)

This cookie baking project became my big time out for the day.  I’m on schedule to finish all our business taxes by the end of next week.  I try to take a good break doing something fun each day, and today  I looked forward to the Malted Milk Sandwich Cookies.   I’m working from home, so when I reached a good stopping point, I went downstairs, put on a chick flick, and started baking.  By the time the movie ended all my cookies were baked and filled and I’d cleaned up my mess.  Not bad for rolled out cookies that are filled and sandwiched...sometimes I pass over this type of cookie thinking it will take too much time, but they finished quickly.

When my first batch was baking, #2 Son who was home doing school projects, came in and sat at the kitchen table to work.  He couldn’t resist the cookies baking in the background of his work.  He told me earlier that he is enjoying baked goods lots more since he moved back home.  He attributes his new likes to all the baking aromas in the house that get him hungry for foods that have not interested him in the past several years.  Well, of course, most store-bought bakery items are not close to my freshly baked goodies that are filled with lots of love! I honestly don't eat store bought baked goods either.

“Hope ya don’t mind, Mom, but I keep snitching cookies every time I walk into the kitchen.  They’re really good.  Kinda like Vanilla Wafers but way better.” (I would have had more than 80 sandwiches.)

“Well, son, they will be much better when they are filled.”

And then, later, after filling and sandwiching the cookies:

“MMMMM    MMMMM!  I could eat a hundred of these.  This is a recipe for a belly ache!”

That all made me feel really good.  If fussy #2 likes them, for sure our class mates will too!

And, yes, they did.  A few classmates phoned me later and wanted the recipe.  I asked for a critique.  They all replied that they loved the cookies just the way they were.  Great texture and super flavor.  And, they are quite pretty too.

So, I’m glad I added all the orange zest and juice.  They really are a good cookie that I will bake for sure again soon.

Loved my baking break today and loved even more sharing a successful new recipe with my friends.  Hope you all had fun with this recipe too!