Wednesday, August 31, 2011

French Friday with Dorie: Corn Soup, Slow Roasted Tomatoes, and Peach Pie

PERFECT SUMMER SOUP FROM END OF SUMMER HARVEST
CORN SOUP TOPPED WITH CHOPPED BACON
Cut from the cob, the corn became an main ingredient for corn soup.  I have many memories associated with summer corn on the cob.  My grandpa planted about 50 acres of corn every spring.  All his big family looked forward to the 4th of July picnic in his large front yard where we annually ate our first ears.  My dad would find an old gunny sack made from burlap which had once been filled with some type of grain for the farm animals and together we would walk to the corn fields, picking only the ears that felt full and were ready for eating.  I learned that there is a big difference between "field corn" which was grown for the farm animals,  and "people eating corn."  Grandpa's eating corn was the best around.  Grandpa was not only a farmer but he was also a scientist.   He had graduated from a major university and then with 7 of his brothers had served on WW1.  His life experiences were rich as a community leader, but his heart was on the farm and that he where he stayed and reared his own family.  Every year he tried new varieties of corn and other vegetable seeds some of which he developed on his own.  I remember the first year he planted a variegated white and yellow corn that we all decided was the sweetest variety we had ever tried.  I always chose the very young and tender ears, my dad liked them a day or two more developed on the stalks, and Grandpa liked what I thought was "old" corn; the most mature ears were his favorites.  Back then everyone always ate 5 or 6 ears with their meal.  Now my whole family eats just 5 or 6 ears...they get broken in half or thirds and are just a casual side dish.

CORN IS CUT FROM THE COBS
Years ago, when we lived in Upstate NY, we had a bountiful  vegetable garden every summer.  We grew enough corn for eating and for freezing and it was delicious.  I remember taking grocery bags filled with freshly picked corn on family campouts where we soaked the ears still in  their husks in big tubs of cold water waiting for our campfire to die down, resulting in mounds of hot coals which we use to roast our corn.  Sometimes this corn was all we wanted for dinner.  Slathered with butter and seasoned with salt and pepper this corn became not only dinner but a cherished memory.

Now our store bought corn gets grilled and instead of sweet butter it gets painted with herb infused olive oil which, even though it is delicious, does not meet my homegrown corn memories from earlier years.

The Phoenix SE Valley does have good corn, but it ripens in May and has a season of about 2 weeks.  By this time of year, as the rest of the country is enjoying the field's harvest, our short-lived corn season is just a springtime memory.  But there is still something comforting about bringing home corn on the cob, shucking it, and then using this "fresh" produce for our dinner, even if it has been shipped in from Utah or Colorado and is not "garden fresh."  Today it was used for a delicious soup that included other "garden fresh" vegetables and herbs.

And as I shucked the corn, I was reminded of another memory.  And part of all this blogging is to keep my memories, so I'll continue that tradition...so many memories include our foods.  When my Jeni first came to our family at the age of fifteen and a half, she had never experienced even such simple pleasures as shucking corn.  In her orphanage they had never eaten corn.  One day, as part of our dinner preparations, I asked Jeni to take a dozen ears outside and get them ready for steaming.  I explained to her that when all the husks were removed, and I peeled off a few as my example, she would find the corn.  She had never before known how corn grew.  After an hour had gone by and most of our meal had been readied, I wondered where the corn and Jeni were.  I found Jeni  sitting on a chair, next to a trash can, carefully peeling away each piece of husk from each ear of corn, and to that point she had only cleaned 6 or 7 ears for cooking.  I remember being annoyed.  I took the remaining 5 or 6 ears and quickly shucked them all in less than a minute and returned to the kitchen.  As I was rinsing the corn and putting it into the pot,  I had the thought that I needed to be more patient and to show appreciation to Jeni.  She did not know that one could take most of the husks and rip them off in a single motion...she had never done this before.  It was a new experience.  She was learning.  I had expected a 15 year old girl to know some things, but how could Jeni know?  She had never seen this "real" corn before, never handled it, and did not know that corn on the cob is sturdy...she had been afraid that she might dislodge the fragile kernels from their cobs and ruin this part of our dinner.

COBS STEEPING IN THE HOT MILK; VEGES SAUTEING IN BUTTER
To make the soup I cut the corn kernels from the cobs while heating 3  Cups of milk to boiling.  The cobs were saved and steeped in the hot milk, adding a sweet flavor to the broth,  while other vegetables were prepared.  An onion, several stocks of celery, 3 carrots, a sweet red pepper, several scallions, and minced garlic were sauteed in butter until just beginning to soften.

To season the soup I added a rosemary sprig, some parsley, salt and pepper,  and 3 Cups of chicken stock.  (The recipe called for added water, however, this dilutes the flavors and I wanted added flavor.)
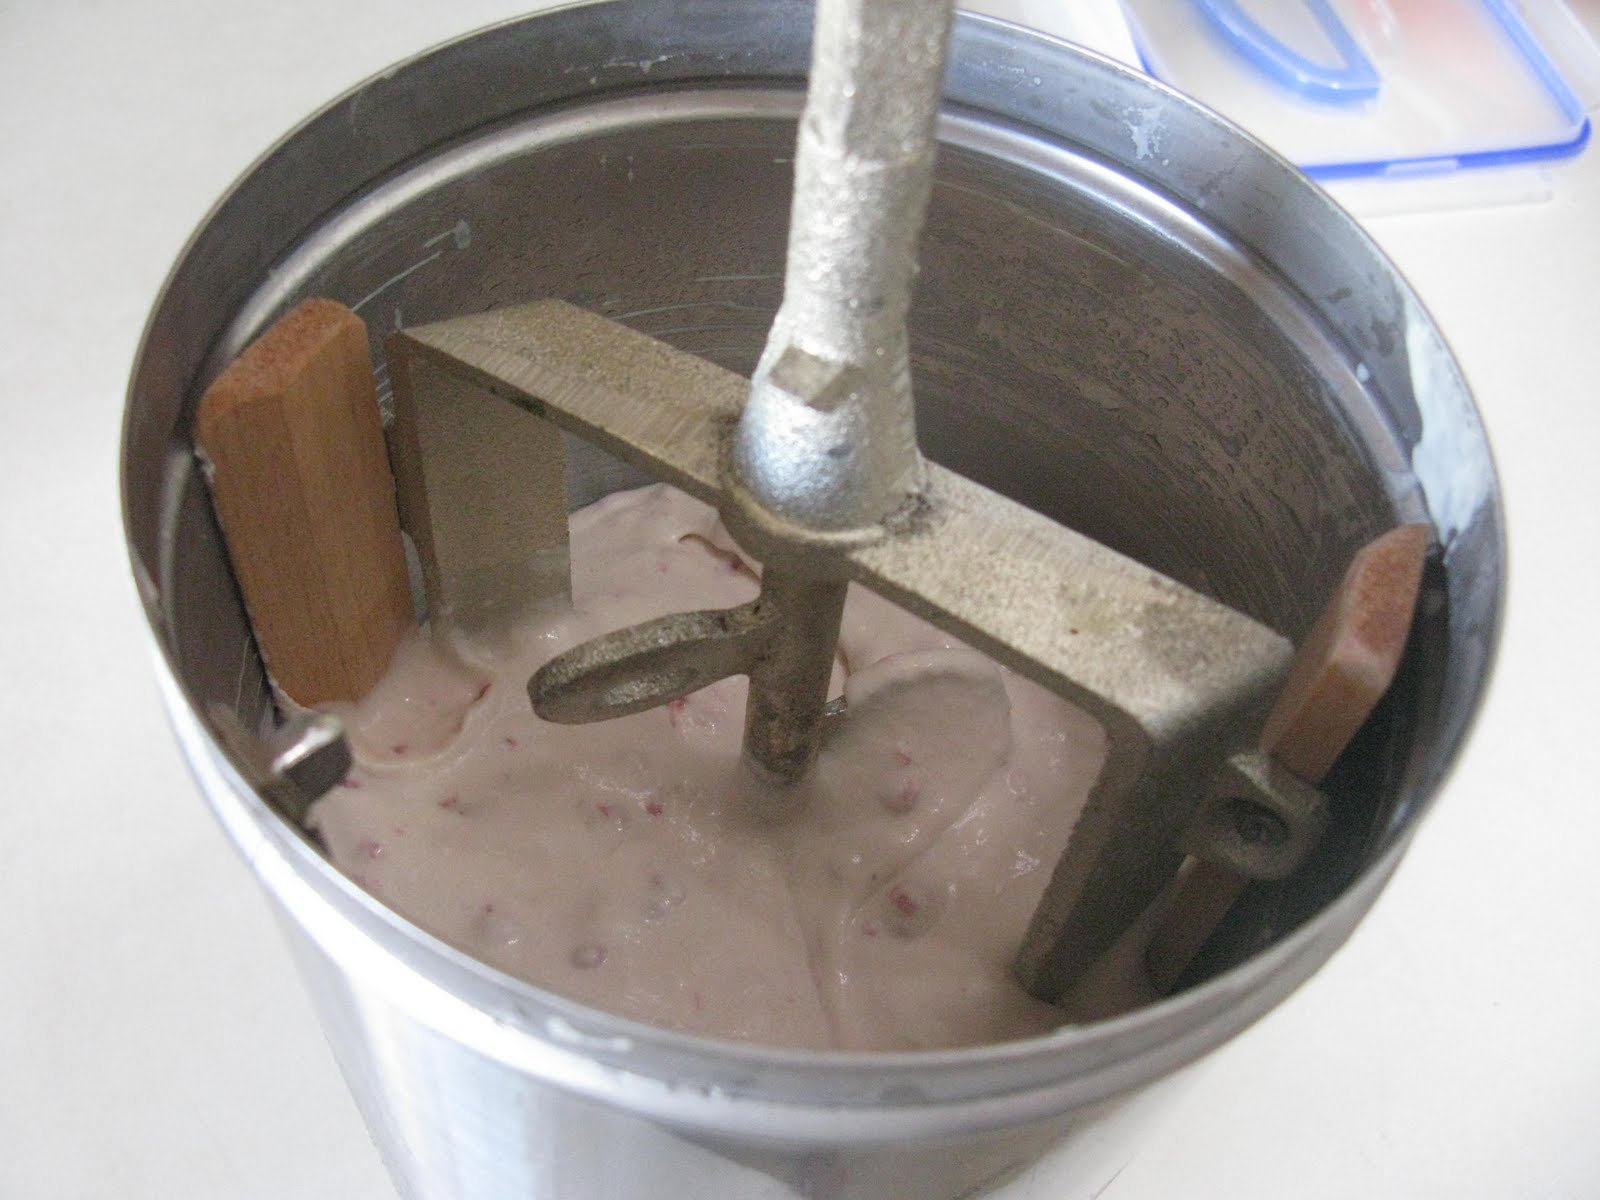
CONTENTS OF BOTH POTS ARE COMBINES AND THE CORN SOUP IS SIMMERING
The sauteed veges were added to the milk less the cobs, and the seasonings were added.  The soup simmered for about 10 minutes while I finished cooking a few strips of bacon, and by then Hubby could not wait another minute before eating.    I ladled a bowl of soup  and garnished his portion with chopped bacon.

Hubby enjoyed the soup and commented several times during the evening that the soup was really good.  I had been a little apprehensive to give it to him as it was simmering-hot, and our outdoor temperature is also very hot this evening...even after the sun had retired it is remains 112^, and Hubby had just come in from raking under our citrus trees.   I had planned to set a pretty table and put out several garnishing choices such as creme fraiche, grated cheese,and  fresh cilantro, but I was lucky to get a photo, before the bowl of soup was taken.  That's a good thing, but at that point I gave in and ate soup too.  Hubby's right.  This soup is good.

In between the soup making processes I decided to catch up on a recipe I missed last month, Slow Roasted Tomatoes, which I had not given much thought until I read so many positive reviews and decided I was missing out.

TOMATOES CUT IN HALF, OILED, SEASONED AND READY FOR A SLOW ROAST
I cut enough grape tomatoes in half lengthwise to fill 3 cookie sheets which were lined with silicone mats.  The tomatoes were drizzled with olive oil, sprinkled with salt and pepper, and then I decided to mince my garlic and spread it over all the tomatoes.  Rosemary and thyme sprigs were added to the pans which were put into a 225^ oven for a slow roast.  To finish the 3 pans, which were placed on 3 different oven racks,  took 5 hours.The recipe states that 3 hours would finish this roasting process, but since I was filling the oven and crowding the pans I knew it would be a longer time.
BEAUTIFULLY ROASTED AND READY FOR A VARIETY OF DELICIOUS USES
It is midnight and I've just taken my roasted tomatoes out of the oven for cooling.  I plan to place them into a container, cover them with olive oil, and then refrigerate them after I've let them cool.  I will use part of them tomorrow in a pasta dish.  Can't wait.  The remainder should keep well, refrigerated,  for up to 3 weeks.   I tasted a few and they are soft and sweet and  I'm hungry again.

JARRED UP IN OLIVE OIL AND READY FOR THE FRIDGE
So, it is good that I made peach pies as part of tonight's cooking....had to do something during that long roast.  I'm actually eating a couple of pieces as I write up this post.  All the smells and tastings have kept me hungry all night.

OK...SO I DIDN"T DO PASTA...BUT THIS PORTABELLA /RED ONION WITH PESTO PIZZA WAS A GOOD WAY TO GARNISH WITH MY LOVELY  ROASTED TOMATOES

 And my favorite PEACH PIE recipe is:

Dough for a double crust pie

6 or 7 ripe but firm large peaches
1 Cup sugar
2 T cornstarch
2 T quick cooking tapioca
1 t cinnamon
1/4 t nutmeg
pinch of salt
Fruit Fresh if desired.

1 egg, whisked
1/4 Cup sugar for sprinkling pie top

Preheat oven to 350^.

In a large pot, bring to a boil  2 or 3 quarts of water, enough to cover 3 or 4 whole peaches.
Roll out bottom crust and place in 9"  pie pan.  Roll out top crust and keep it ready.

Scald the peaches in the boiling water for 30 seconds, let cool slightly, and slip off the peels.  Cut peaches into 1/2" slices and discard the pits.  Sprinkle with a teaspoon of Fruit Fresh which is usually found in the canning section of grocery stores.  A little lemon juice also works to keep the peach slices looking fresh.  But, if you work quickly these are not needed.

Place slices in a large bowl and add remaining ingredients.  Toss gently until combined...mixture will become juicy.

Ladle the peach mixture into the bottom crust and add top crust.  Crimp the pie edges together and cut slits into the pie top crust as venting for steam to escape during the baking process.  Place the ready-to-bake pie onto either a parchment lined cookie sheet or on a large silicone baking mat...something to catch any juicy drippings that may escape from your pie.  It is easier to clean these items than to scrub your oven.

Whisk 1 egg and brush it onto top crust.  (Discard portion not used...one egg will cover about 4 pie tops.) Sprinkle generously with your favorite sugar.  (Leftover pie dough can be rolled and cut into decorative shapes to garnish your pie.  Just "glue" them to your pie with a little water or egg wash.  Also brush these cutouts with egg for uniform baking.)

Bake for 60 minutes, check to see that filling is bubbling through the vent slits and crust is browned.  (A glass Pyrex type pan allows you to also see that the bottom crust has browned and will not be underbaked and thus soggy from those wonderful, juicy peaches.)  Your pie may need an extra 10 minutes of baking time.  It is better to have a well done crust than a crust that is soggy or underdone.
PEACH PIE
With corn, tomatoes, and peaches I am enjoying some of  summer's harvest.  These kinds of food are favorites and are a memorable part of our family traditions.


I look forward to seeing my fellow Doristas' fare.  It was actually fun when my Frolicking Night Owl daughter and family came over earlier and we discussed her soup which she made very differently than mine, even though inspired by the same recipe.  I enjoyed hearing about her ideas and look forward to all yours too.
MY MIDNIGHT SNACK


Monday, August 29, 2011

Kris' Zucchini Bread and K.A. Zucchini Chocolate Cake

ZUCCHINI BREAD IN CUPCAKE SHAPE WITH VANILLA CREAM CHEESE FROSTING
I enjoy baking and sharing an old family favorite Zucchini Bread recipe.  Several times each year this recipe is used, varied slightly depending on mix-ins, or shape, or whether or not it is frosted or glazed or sprinkled with powdered sugar.  No matter the size or variety it always bakes nicely and always tastes great.  It is moist and forgiving...even my young children successfully used this recipe.  Sometimes we add a little orange zest and juice to the frosting, and we've been known to add drained, crushed pineapple, minced apple, or other fruits.  This recipe works just fine if a little more zucchini gets added, or an extra egg needs to be used.
JENI'S LOAVES
Recently Jeni, my number 5 daughter, came home to bake several loaves using this recipe.  We had a great day together and were rewarded with delicious bread.  It was a memorable mother/daughter day.  One of life's treasures.  She chose to use only cinnamon as a spice, and it was delicious.

THE LOAVES THAT DIDN'T GET EATEN IMMEDIATELY WERE FROSTED
Today I used the recipe to make cupcakes which were wonderful. I added pecans and chocolate chips.   I topped them with a cream cheese, vanilla frosting and shared them with friends, family, and the office folks.  To frost the 70 cupcakes I made today, I used the following amounts for my  cream cheese frosting:

1 C unsalted butter, softened
2 packages (8 oz) full fat cream cheese
2 T vanilla extract
1/2 of the bag  of powdered sugar I get at Costco...depending on how stiff I want the frosting I may use a little more or less.  Today I wanted a soft frosting that was stiff enough to keep a piped shape.
A little cream may be added if moisture is needed (or fresh orange juice)

This zucchini bread recipe which has been in our family forever is similar to many others.   I've personally used my old handwritten recipe card for at least 35 years.

ZUCCHINI BREAD FROM KRIS' KITCHEN

Butter and Flour 2 loaf pans, or whatever pans you choose...mini, muffin, etc.  For muffin, I use paper liners.

Gather all ingredients
                   
Grate 4 generous C fresh zucchini
Preheat oven 350^

beat together in a mixer:               
                            6 large eggs
                            4 C sugar
Add and continue beating:                 
                            2 C vegetable oil such an canola oil    beat about 2 minutes
Add                     4 t vanilla

In a separate large bowl sift and mix together:   
                            6 C all purpose flour
                            2 t salt
                            2 t nutmeg–or less
                            1 t cloves–optional
                            6 t which is 2 T cinnamon
                            1 t baking powder
                            2 t baking soda

Optional additions:                   

                            1 C chocolate chips
                            1 C chopped walnuts or pecans
                            1 C Raisins or dried cranberries or chopped dates

Add wet ingredients to dry, mix until almost moistened; add grated zucchini and mix just until together...do not overmix.  If adding nuts, etc, add the mix-ins after incorporating the dry ingredients.  (Can mix in with dry ingredients, however, this leaves a flour coating on nuts and dried fruits.)


HOT OUT OF THE OVEN--THESE LOAVES DISAPPEAR IN A DAY
Bake muffins about 20 minutes, a good sized loaf 40+ minutes.  Done when a pick comes out clean, tops are a little browned, and tops spring back when touched.


KA Chocolate Zucchini Cake
 Another fun zucchini cake recipe comes from King Arthur Flour...but...I get better reviews on the recipe above, and for chocolate lovers, the addition of chocolate chips or chunks added to the above recipe  is a good fix.


Chocolate Zucchini Cake, Adapted from KA Flour Recipes, online

MY DELICIOUS TASTE
 1/2 cup which is 1 stick of unsalted butter
1/2 cup vegetable oil
1 3/4 cups  granulated sugar
1 teaspoon vanilla extract
1 teaspoon baking soda
1/2 teaspoon baking powder
1/2 teaspoon salt
2 large eggs
1/2 cup  sour cream, buttermilk, or yogurt...I used buttermilk
2 1/2 cups  Flour
3/4 cup  Dutch-process cocoa
2 cups shredded zucchini (1 large z, will be produce this amount)
1/2 cup  chocolate chips
1 cup chocolate chips, for icing

Preheat the oven to 325°F. Lighlty butter a 9" x 13" pan.

In a large mixing bowl, cream together the butter, oil, sugar, vanilla, baking soda, baking powder, and salt. Beat in the eggs.

Stir in the sour cream, buttermilk, or yogurt alternately with the flour. Then add the cocoa, mixing till smooth. Last, fold in the zucchini and 1/2 cup chocolate chips.  (I'm generous on the C.C.)

Pour the batter into the prepared pan and bake  for 30 to 35 minutes, till the top springs back lightly when touched, and it is set. Remove the cake from the oven, sprinkle it evenly with the 1 cup chocolate chips, and return it to the oven for 5 minutes, or until a cake tester inserted in the center comes out clean. Remove the cake from the oven, and use an offset spatula to spread the chocolate chips into a smooth glaze. Cool on a rack. Yield: 24 servings.

I sprinkled with sugar crystals for extra sparkle as was suggested by KA flour.  We loved this crunchy addition which added a special touch.


Thursday, August 25, 2011

Baked Sunday Mornings: Coffee Ice Cream--Not


FRESH RASPBERRY ICE CREAM
I Love Summertime!  Most of you, out there in cyberspace, would fry here in AZ today...we expect 116^...there is a heat advisory in effect...but I love the heat....reminds me of that line in Twilight where Bella is moving to Forks from Phoenix, and she will miss the heat.  It's addicting!  There are so many fun ways to cool off.  There is the pool, shopping at the mall, running through the sprinklers, the movie theaters, Sonic 44 oz sodas, and.....ice cream.  For today’s assigned Baked Sunday Mornings project we are churning the cream.

SUBBED RASPBERRIES, A LITTLE VANILLA AND 2T CHOCOLATE ITALIAN SODA FLAVORING
Because I am not a coffee drinker or an alcohol user I came up with different flavors to use with our “Coffee Ice Cream” recipe.  I did use the same base and followed the instructions for everything except the flavorings.  It worked great.   I'd say this is a custard; creamy and smooth...and wonderful!


IT'S HONEY'S DAD'S BIRTHDAY TODAY AND SHE HAS COME TO HELP
It is a son-in-law’s birthday and his favorite cake is chocolate cheesecake, so that is baking today.  He loves fresh berries and I have decided to garnish his cake with some lovely raspberries Honey and I picked up at the market earlier this morning...yes, it is Wednesday, my baking day with Honey.  She is my official taster and licks every non-breakable item with delight.

HONEY'S DAD'S FAVORITE BIRTHDAY CAKE
Since I have extra berries, I will use them to make raspberry ice cream, and just for fun, I will flavor the base with a chocolate Italian soda flavoring.  I guess I’m trying to match flavors with that chocolate-raspberry-topped cheesecake.  I doubled the recipe making enough for a fun family birthday time later today.  Fresh raspberry ice cream is one of life’s luxuries.  Most people prefer to strain out the seeds after making a puree.  But today, I decided to use the whole, fresh berries which will make it more “real.”  And that's just what No. 1 Son said, it is just more "real" with the whole berries.

OTHER INGREDIENTS:
6 egg yolks
1 3/4 Cups heavy cream
2 Cups whole milk
1 Cup sugar
1 t salt...a pinch is enough

Cook just like you would pudding or pastry cream.  Chill, Churn, Eat and Enjoy!

THE ICE CREAM IS CHURNING
FRESHLY CHURNED

A FAVORITE CHILDHOOD MEMORY:  LICKING THE DASHER...ICE CREAM RIGHT FROM THE MACHINE

SMOOTH AND CREAMY; READY FOR THE FREEZER
The only complaint from my tasters is that this recipe has too much salt...it was a flavor that was noticeable.   Some even asked it salt from the churning process had entered the ice cream container.  No, it had not.  I checked other ice cream recipes that we enjoy and for a similar quantity of ingredients all my other recipes call for “a pinch” of salt, where this recipe asks for 1 teaspoon of salt.  A pinch would have been a better choice.

We always like an excuse to make ice cream and there are so many wonderful flavors that can be made.  Since everything is out and ready to go, I think we will make another flavor and then sit back and enjoy this beautiful summer day.  Nothing beats the taste of freshly made ice cream spooned right out of the machine.

Kris’ Chocolate Cheesecake
Makes one 9" Dark Chocolate “Cake”

THE TAKE HOME CAKE
 Crust: Place contents of one package, Nabisco Chocolate Wafers, in food processor and pulse until small crumbs, similar to making a graham cracker crust.  Add ½ Cup Sugar and pulse until combined (This added sugar is optional or the amount can be adjusted for taste).  Crust needs 1½ - 2 Cups crumbs/sugar.  Add 1/4 Cup (½ stick) melted butter to the crumbs and combine quickly  with a dinner fork.  Dump this mixture into a buttered 9" springform/cheesecake baking pan.  Spread  and press with hands  onto the bottom of the pan.  Bake 350^ for 10 minutes until set.  Let cool.

Soften to room temperature four 8 oz packages full-fat cream cheese.  Whip in mixer bowl until creamy and smooth...may take about 5 minutes.

10 oz bittersweet chocolate: Chop into small, uniform pieces, melt, and set aside to cool:.  (Melt in microwave for 1 minute, then stir till smooth)

Mix 1 2/3 Cups sugar and 1/3 Cup cornstarch together.  Add to cream cheese and whip together for 2-3 minutes.  Again whip until creamy and smooth.

In a separate bowl, whisk 2 large eggs and add to the above whipped mixture, again whipping until  smooth.

Add in the melted chocolate and continue mixing until the batter is all a uniform color.

Add 3/4 Cup heavy cream.  Mix until jut incorporated.  Do not over mix.

Gently add the cream cheese mixture on top of the cooled chocolate crust.

Wrap a large, single sheet of aluminum foil around the springform pan, covering the bottom and up the sides.   (To keep out water from the water bath)

Place the foil covered pan into a shallow baking or roasting pan that will be used as the water bath and slide into a preheated 350^ oven.  Add very hot water to the water bath pan.  Water should come  about 1 “ up the sides of the springform pan sitting in that water bath..

Bake for about 1 hour 15 minutes, until the edges of the cake look  baked and the top of the cake is set.  Do not underbake or the cake will sink in the middle or be gooey.  Proper doneness may actually take an extra 5-10 minutes.  Make sure the water bath does not become dry.

Remove pans/cake from oven, remove springform pan from water bath pan, very carefully remove foil, and set cake to cool, undisturbed for at least 2 hours.  DON”T TOUCH!  Then refrigerate the cake until thoroughly chilled, about 4 hours.

This cake releases easily from sides and bottom of pan.  You may want to run a knife around the sides before releasing the spring, just to ensure that the cake comes out of the pan perfectly.    Any fears?  Just freeze the cake for 30 minutes and the stiffened cake will not break or stick to the pan.  After sides are removed, run an offset spatula between cake and pan bottom for a perfect release.  Cake is sturdy enough to handle gently and move to a pretty serving platter.

Now have some fun.  Make a ganache by melting together 6 oz chopped  chocolate, 1 stick (½ Cup) of butter, and 1 Tablespoon light corn syrup.  Cool slightly and then pour onto the cooled cheesecake.  Spread with an offset spatula.  You can let it drizzle down the sides or just keep to the top of the cake.  Then add chocolate curls, fresh fruit or berries, or any other fun decoration.  Caramel sauce, chopped nuts, marshmallow, and other candy toppings are also fun additions.  A slight dusting of confectioner’s sugar is nice and making a “dirty” platter is fashionable.  A chocolate web to top this cake can be made by piping thin lines of melted dark, milk, and white chocolate.

Refrigerate until just before using...then 10-15 minutes out of the fridge helps with slicing.  Also, slicing with a warm knife makes professional looking cuts.

We seem to be in to much of a hurry to eat the dessert to cut it correctly.  Oh well, it is delicious and a dessert fit for my birthday guy.

(A drizzle of sweetened raspberry puree on the serving plate is also fabulous if you are decorating this cake with fresh raspberries and have a few left over.)
CHOCOLATE CHEESECAKE AND FRESH RASPBERRY ICE CREAM.  DOESN'T GET MUCH BETTER!

French Friday with Dorie: Cafe Salle Pleyel Hamburger

PERFECT BURGERS FOR A HOT SUMMER DAY
It’s a scorcher today in AZ.  At cooking time it is 114^.  A nice day for slider size burgers instead of  huge meal size burgers.  On hot days our appetites are smaller and high water content foods such as fresh veges and fruits have more appeal.  To please my family, I took the Idea from today’s assigned FFwD recipe, and added lots of chopped/ grated veges and toppings.

SPICY PEPPERJACK CHEESE WAS USED TO TOP THESE BURGERS
About a week ago we visited a cheese factory and brought home several varieties of wonderful  freshly made cheeses.  A spicy  pepperjack  was chosen to top our burgers  instead of the Parmesan requested in the recipe.

LOTS OF FRESH VEGES AND HERBS MAKE JUICY, FLAVORFUL BURGERS
EVERYTHING MIXED TOGETHER
My ingredient list included: sweet red peppers, red onion, garlic, grated potato, grated carrot, fresh cilantro and thyme, 90% lean ground beef, 2 eggs which helped hold all the mixture together, salt and pepper.  I used fresh mini buns from a local bakery.  For condiments I used sliced tomatoes, lettuces, mustard, and ketchup.  And...I made the onion marmalade per the recipe using additional red onion, however as it cooled it seemed greasy to me.  Next time I will saute the onion in a very little olive oil.

RED ONION MARMALADE USED AS A CONDIMENT
OVEN FRIES MADE WITH A LITTLE OLIVE OIL, SALT AND PEPPER
THE BURGERS WERE READIED AND LEFTOVERS WRAPPED TO FREEZE FOR FUTURE MEALS
OUTSIDE GRILLING THE BURGERS
As a side, I broiled oven fries coated with a little olive oil, salt and pepper.   I grilled the burgers and melted on the cheese outside instead of frying the meat in the house.  I considered frying the potatoes, French Fry style, outside, but with all the veges included in the meat,  the meal seemed healthy and I kept the potatoes also on the healthy side.  I made 20 slider-size burgers which were enjoyed by several family members who stopped by to taste...it was easy to eat 3 or 4 per person.

A PERFECT SIZE MEAL FOR A HOT SUMMER DAY
Everyone enjoyed my slider-burgers, appreciating the smaller size...they all especially commented that this meat mixture is really good and flavorful.

These burgers make a good, prep ahead meal with a short cooking time.   The veges and seasonings can be prepared and mixed into the meat and refrigerated in advance, the fries can be cut and soaked ahead, and cook/put together time is only about 15 minutes.  Nice.
                           
As I look at what my cyberfriends have done with this recipe, I expect to see some big juicy burgers with beautiful toppings.  I always enjoy getting your great ideas.
YUM!


Saturday, August 20, 2011

Baked Sunday Mornings: Grasshopper Bars


CREAMY, MELT-IN-YOUR-MOUTH CHOCOLATE, MINTY BARS OF DREAMY GOODNESS


HONEY AND BABY M GO SHOPPING FOR INGREDIENTS--NEED LOTS OF BUTTER AND CHOCOLATE
Because I was out of town I am behind on my baking/posting.  In a effort to catch-up I have baked the Grasshopper Bars (and so did my Frolicking Night Owl daughter, so we compared a few notes) and in the process, I've taken care of a couple of other tasks.

I think I have mentioned that I teach adult Sunday School where we study the New Testament this year.  To keep everyone awake and lively through the sometimes heavy-duty topics, I take a sugar goodie to my 70 member class which I share at the beginning of each lesson...it takes about 15 minutes for the full sugar effect to kick in, which becomes noticeable  with more thoughtful comments and answers, and the men especially love my class.  I'd like to think I am a great teacher (I prepare well, make handouts, maps, etc.), but I really think it is their way of saying they love my treats.  I am positive that 2 or 3 folks attend just for my treats, and I feel it is worth all my efforts to get them there where we discuss good things.  As I pondered what to bake for my class members, I decided to try the Grasshopper Bars recipe and let them be the judges on this recipe.

While out of town, I needed a few more pie plates (I made 28 varieties  totaling 50 pies and pie-size tarts for my nephew's wedding reception), so I made a trip to hit the local thrift stores.  I came across a few other fun finds like this baking dish, which was made in France, and unlike my other Pyrex type dishes, it has unusual handles and a green tint.  So, I thought I would try out my new find, and I also decided to experiment with a few other baking dishes to see which I like most for this type of recipe.

MY NEW THRIFT STORE BAKING DISH
I also used my favorite brownie pan which is from Pampered Chef...from one of those neighborhood parties that I get invited to almost weekly but rarely attend...but this particular item was well worth the party and I recommend it highly for baking any bar cookie or bar cake.


THIS  PAMPERED CHEF STONE BAKER WAS THE BEST BAKER
First the brownie bottom was baked and cooled completely.  I love gooey and extra chocolaty brownies so I added lots of chopped semi-sweet chocolate to the batter...as if this recipe is not rich enough.  Actually turned out great.

MY 9 X 13 PYREX AS SUGGESTED
I tried a few other similar baking pans...had to bake 100 2" square bars...mostly for my class but we needed some at home too.


Then the buttercream filling was made and chilled (while I mowed the lawn...just the perfect amount of time, and it takes a real AZ woman to mow in 112^).   For flavoring I used Italian soda syrup, Creme de menthe, and peppermint extract in the same portions as the recipe called for in the "real" ingredient.  Worked perfectly.  There were, however, some problems with how the recipe was written. First, what is meant by "bring to boil and has thickened"?  Does that mean barely a boil (no amount of time given), and how thick?  My daughter removed the heat at the first sign of boiling, and her mixture had thickened some, but it was never thick enough, even after chilling, and remained runny on her bars...not good.  I boiled my mixture for a few minutes, hoping it would thicken to a more spreadable consistency, but decided that maybe it would whip up and thicken more, possibly  thicken during refrigeration???  The recipe write-up was not clear.

My kitchen is hotter than most...hot outside and baking inside makes things quite hot for our ingredients.  Butter melts just about instantly when removed from refrigeration...and chocolate is a bit soft right out of the cupboard.  So, I refrigerated my beaten mixture and then beat it more, but it did not really thicken to what I would normally use as frosting, for example.


All the baking pans except the Pampered Chef stoneware pan were lined with parchment which left ragged edges all around (those bars around the edges were the ones kept out for us).


THE STONEWARE CAME OUT NICELY WITHOUT PARCHMENT
It was fun to try my new baking pan, but my go-to pan will be the stoneware...much easier and came out well.
BUTTERCREAM SPREAD ON TOP OF BROWNIE
But the quite soft buttercream did spread onto the brownies (I had to use a soft touch), which I then chilled while I finished the yard...about an hour more.  But, before spreading, the instructions say to mix the buttercream again, after chilling, until it is the "proper consistency."  Whatever that means???  What is the proper consistency?  Frolicking Night Owl definitely did not achieve the proper consistency and she is a good baker.  I'm wondering if anyone has a "too firm" filing that needed to be placed over a pot of simmering water and re-mixed to "proper consistency?"  If so, I"m sure they do not live in AZ!


THE GANACHE...HEAVEN IN A BOWL

Then I melted the chocolate and butter mixture and it is, well, wonderful enough to make any day your best day ever, and, for sure, this had a "proper consistency."  How could it be anything else?  Butter and chocolate melted together and smooth as glass, well almost, when poured over the buttercream mixture.

Then back to refrigeration for another hour, then cut into squares and boxed up ready for my class.

Our tasting was a delight!!!  What is better that all this butter and chocolate and creamy goodness?  Hubby went to weight watchers right after I did this baking so he tried hard to refuse a taste, but he tried a tiny portion and then came, I suppose unfortunately, for more.  Number 1 son appeared with a friend and they ate a whole pan.  Probably a pound of butter apiece.  No complaints.  They tried to sneak more to take home, but my class has to be treated...maybe there will be a left over to bring home...NOT!

I hoarded away a few for our family Sunday dinner, but soon these delicious bars will be gone.  Since there are several time-taking steps for this dessert, I can't just whip them up every time I dream about them, but I will need to rearrange my life so that I can make them often.  Now that I know what I want for my personal "proper consistency" I'll be baking these again soon and often.  This recipe is a keeper!!!!!!!

OK, I'm giving in.  As asked, here I am...first pic of me on this blog, but I can do it with my grandkiddies!  My baking buddies are the best tasters and lick-the-beaters helpers anywhere.  So whatever vision cyperspace friends have had of me is now banished and here is the real me...
HONEY AND BABY M...SOME OF MY BEST FRIENDS